Create Angular project step by step
Dear Readers, This tutorial covers :
- Preparation of environment
- Creation of First angular project
- Run the default generated angular project
- creation of best architecture of project
- call apis with Http
- Create services for http call, error handling etc.
- Registration and login with JWT toke
- decode token and get data from token
I believe the good way to learn anything new is to do more practical instead of theory . So after a short description will go straight for practical.
Lets see what is angular and why to use : Angular is a JavaScript based application design development framework for creating SPA(single page applications). Its a framework means it provides us all the required elements which are needed to develop a SPA. To understand more details kindly follow the https://angular.io/docs .
Preparation of environment : In order to start angular development we need to install some software as below :
- Node.js: can be installed latest version from https://nodejs.org/en/
2. npm pacakge : run npm -v in a terminal window :

3. Install vs code :https://code.visualstudio.com/download download window version and install in your pc.
4. Angular cli: angular cli creates your angular project , generate application and library code, and perform a variety of ongoing development tasks such as testing, bundling, and deployment . to install it type below command and hit enter :
npm install -g @angular/cli , this command can be run through vs terminal also . that will see later .After running this command latest angular cli will be installed in your pc , so for any application you no need to install seperately. If you want to install specific version kindly run the command :
1 | npm install -g @angular/cli@versionthatyouwant |
So , here we have all the required software to start development.
Lets create our first default angular project using vs code:
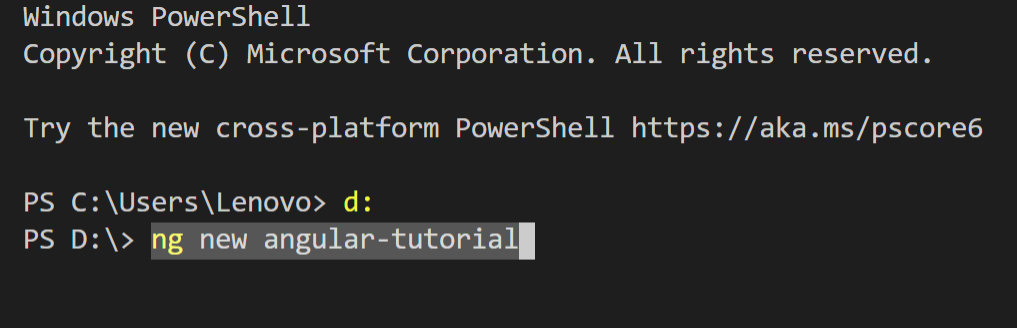
- open vs code – go to terminal ->new terminal and type below command in your folder location : ng new angular-tutorial (angular-tutorial is my project name) and hit enter . In the below screen shot I have created my project in d drive .
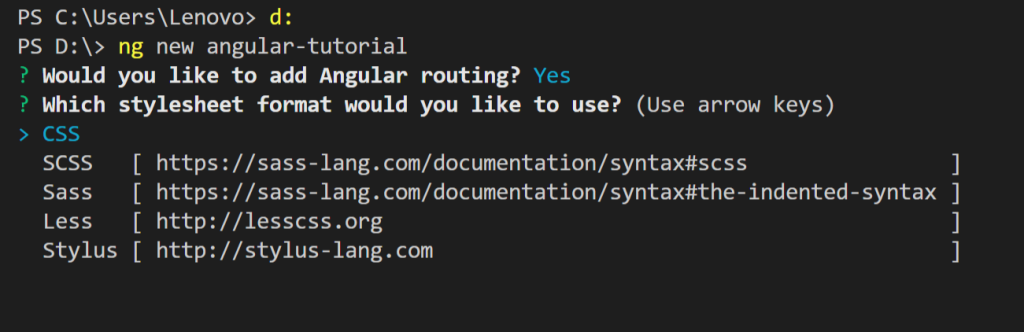
Once I hit enter I can see below option to select , for routing I will enter yes and enter then it asks me to choose stylesheet ,you can choose css/scss . since I am going to use css so I will choose css and press enter.
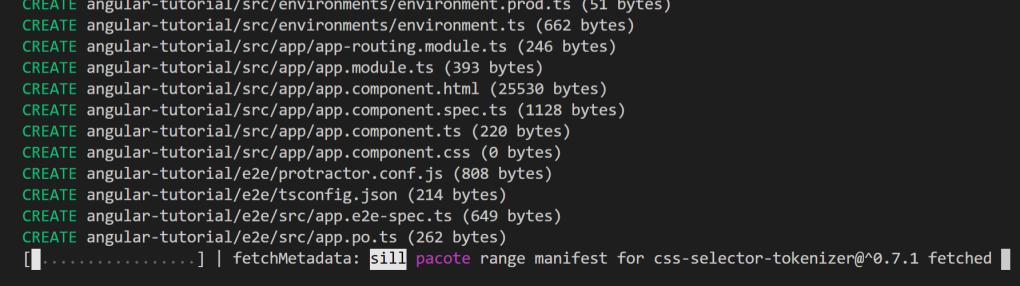
You can see something like below screen while creating new project :
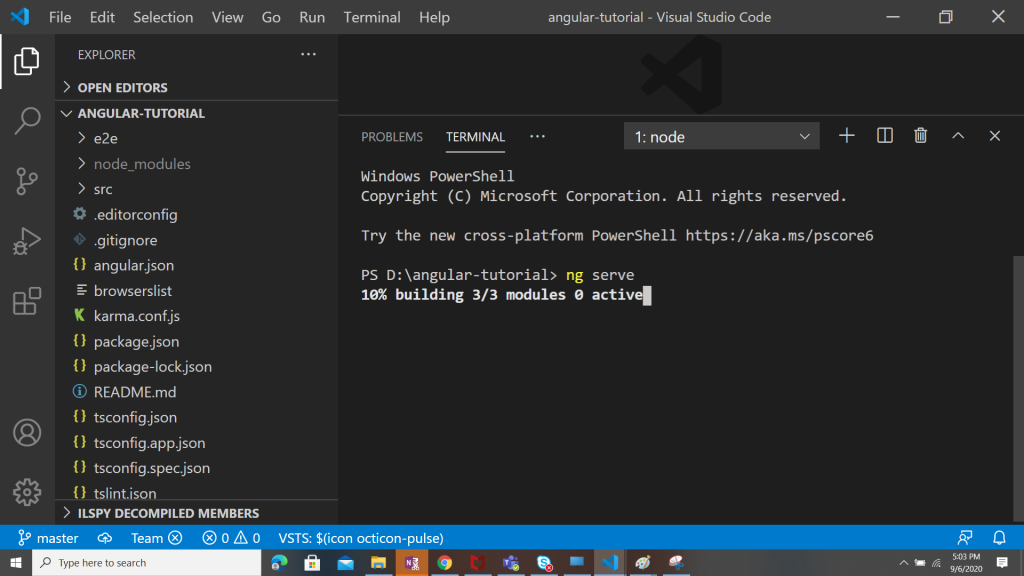
Once project created go to file->open folder ->browse your newly created project and click on select folder . your project will be opened in vs code workspace.

To run this project : go to terminal->new terminal->type ng serve
If you want to build first then type ng build then ng serve . ng serve will build then run the application. after building you will see below url to browse your app.
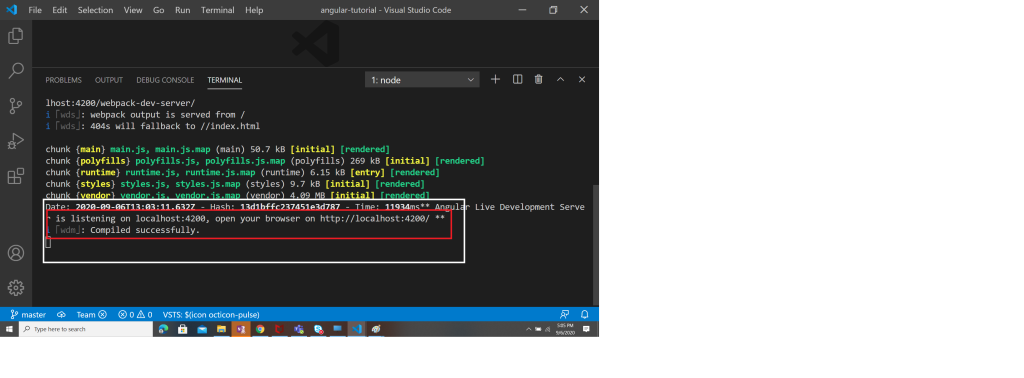
Here you are ready to browse your first default angular app . open google chrome /browser and type http://localhost:4200 and you will see your app is running.
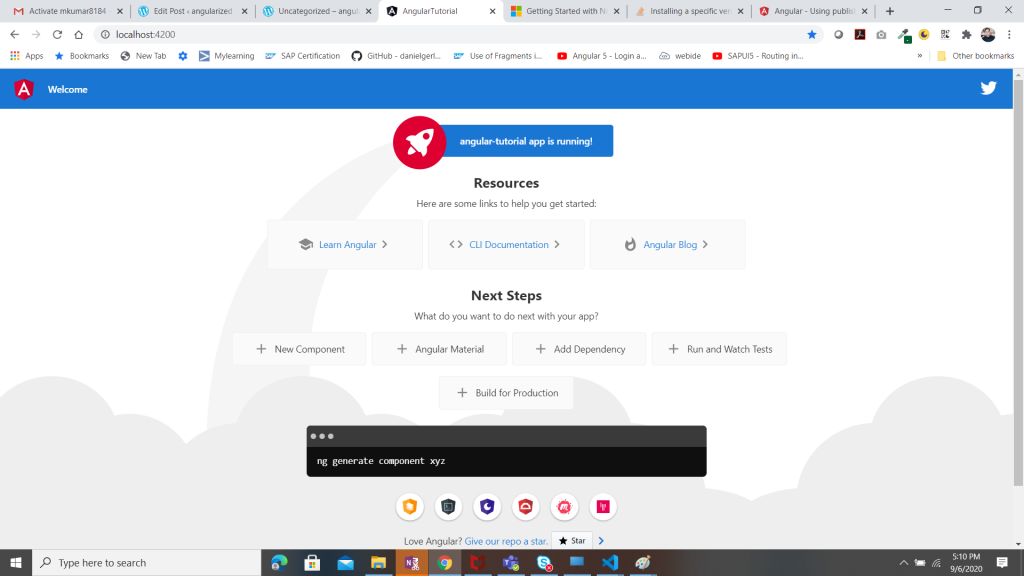
Here we have completed our lesson to setup and create first default project . In next lesson we will learn how to change and customize pages .


Comments
Post a Comment